In this article about drip irrigation system we will go through each step of installing a dripper for a pot in your garden.

Drip Irrigation System for pots
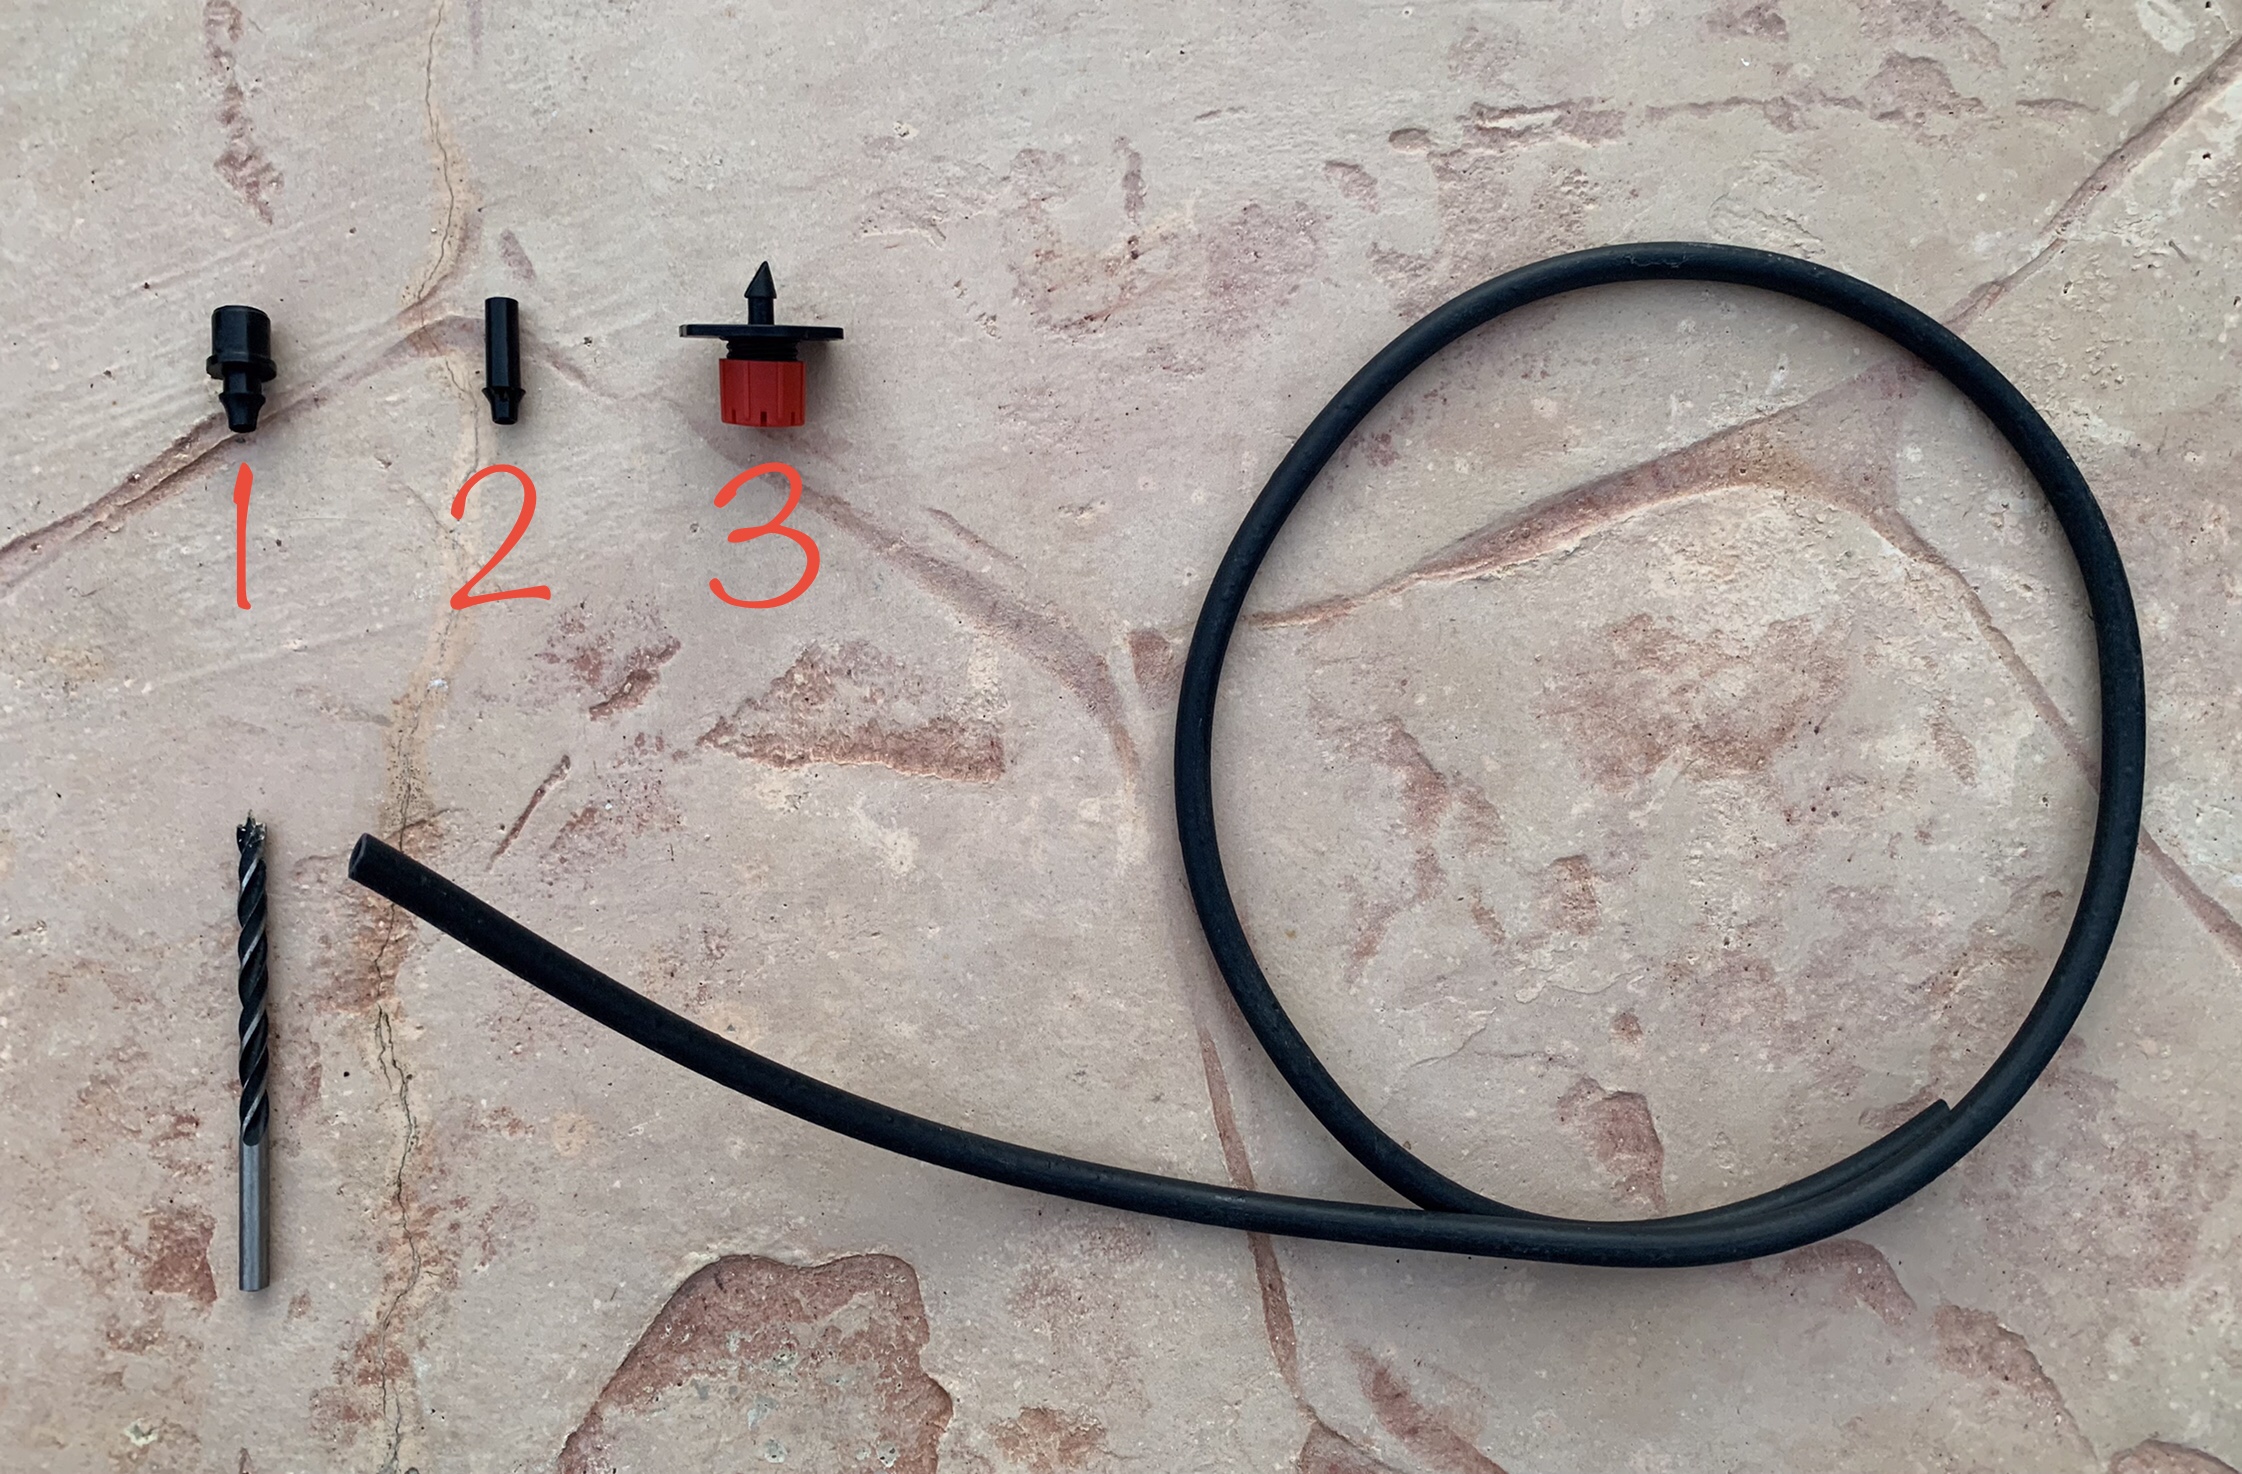
Materials
- Big Connector
- Small Connector
- Dripper
- Water Hose
- Drill
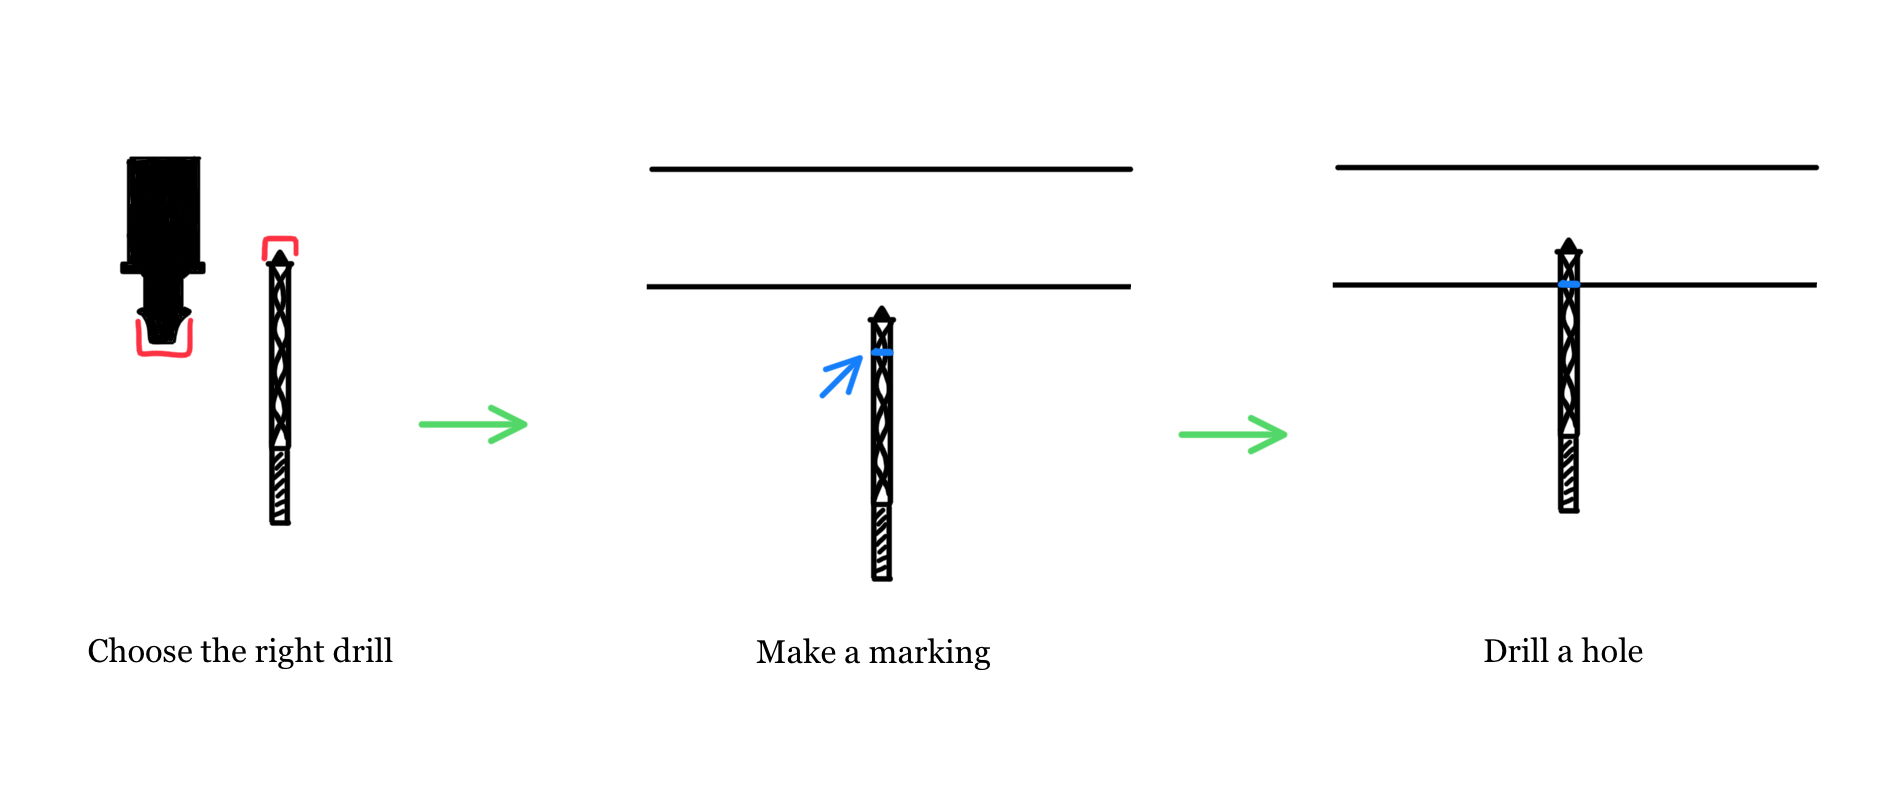
Step 1
In this step you should make a hole in your water pipe for irrigation. The hole should be a few mm smaller than the diameter of the big connector (1). Select a drill (5) and compare its diameter with that of the connector (1).
Make a marking on your drill using tape or band to ensure that the drill won’t go all the way through your water pipe.
Step 2
Next insert the big connector (1) into the water pipe.
Step 3
After that insert the small connector (2) into the big connector (1). The funnel of the small connector should point at you.
Step 4
In this step join the water hose (4) with the small connector (2). To make the process easier, first place the end of the water hose into a hot water for 10 seconds and then connect it.
Step 5
Finally, connect the dripper (3) to the water hose (4) and by turning its red head find the right water pressure for your plant.
Final Words

Drip Irrigation System: Final Result
I hope you found this article useful. Feel free to comment about your own experience below and good luck with your drip irrigation system!